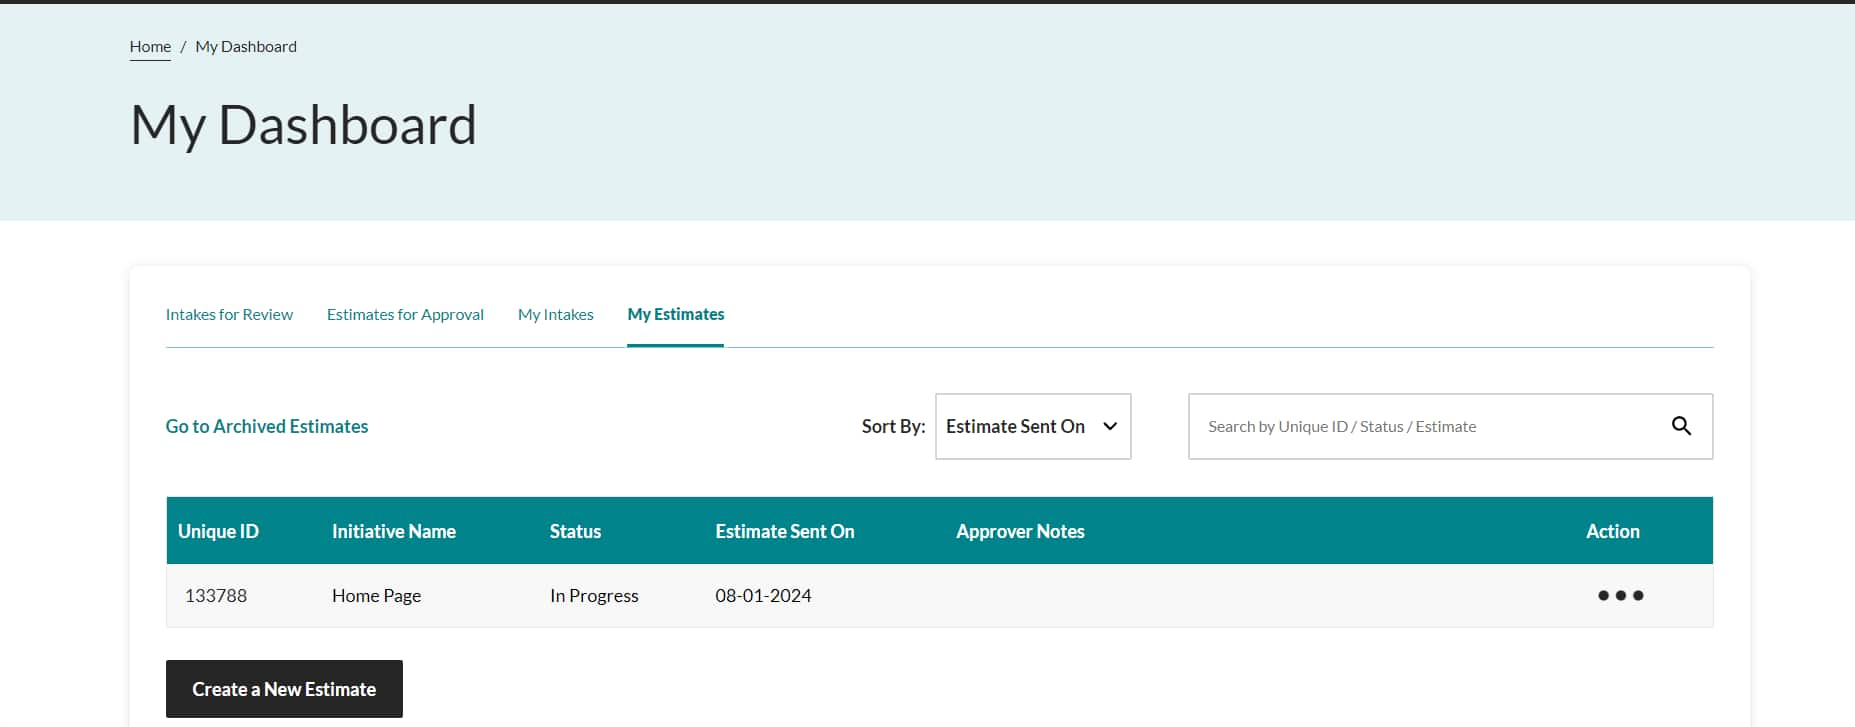
The estimator tool is designed to assist Solution Architects (SA) to accurately estimate the effort required for a project. The tool takes into account specifications, unit complexity and historical data to provide optimal calculation of effort required for a project. There are 4 steps in the estimator tool that the SA must complete:
Initiative Details
Feature Details
Work item details
Generate report
Once the above information is inputted the effort in days is calculated and a report is generated.
Steps to Follow:
User can land to the Estimator tool from Work Management page, What is trending Section in Home page or from Dashboard page--> Create new estimate

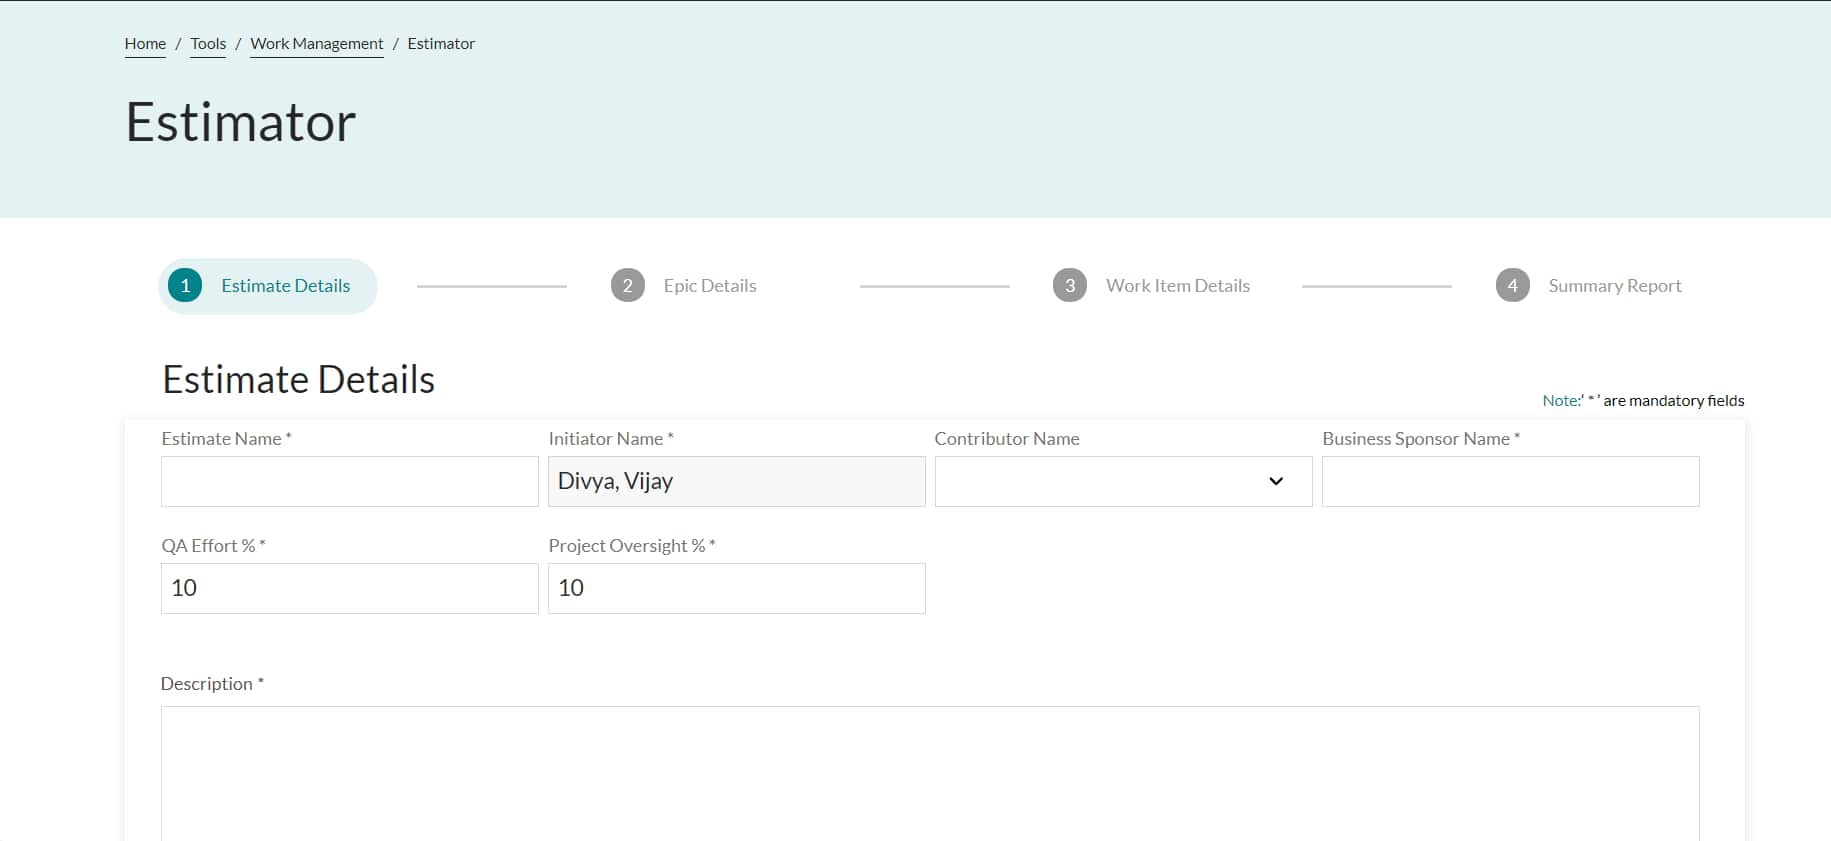
Step 1 - Initiative Details
Once the User is on the Estimator Tool, he/she should click on Create an Estimate button which will take the user to the form
Here, the user is supposed to Fill the Initiative name for which the estimation is going to be done, Initiator name will be auto populated, Contributor name should be selected from the Drop down if the Solution Architect (SA) wants more SA’s to Contribute to the estimate.
The business sponsor Name and Description should also be filled.
QA Effort and Project oversight would be auto populated and User can change the same if required.
All the fields except Contributor name is Mandatory.

Step 2 - Epic Details
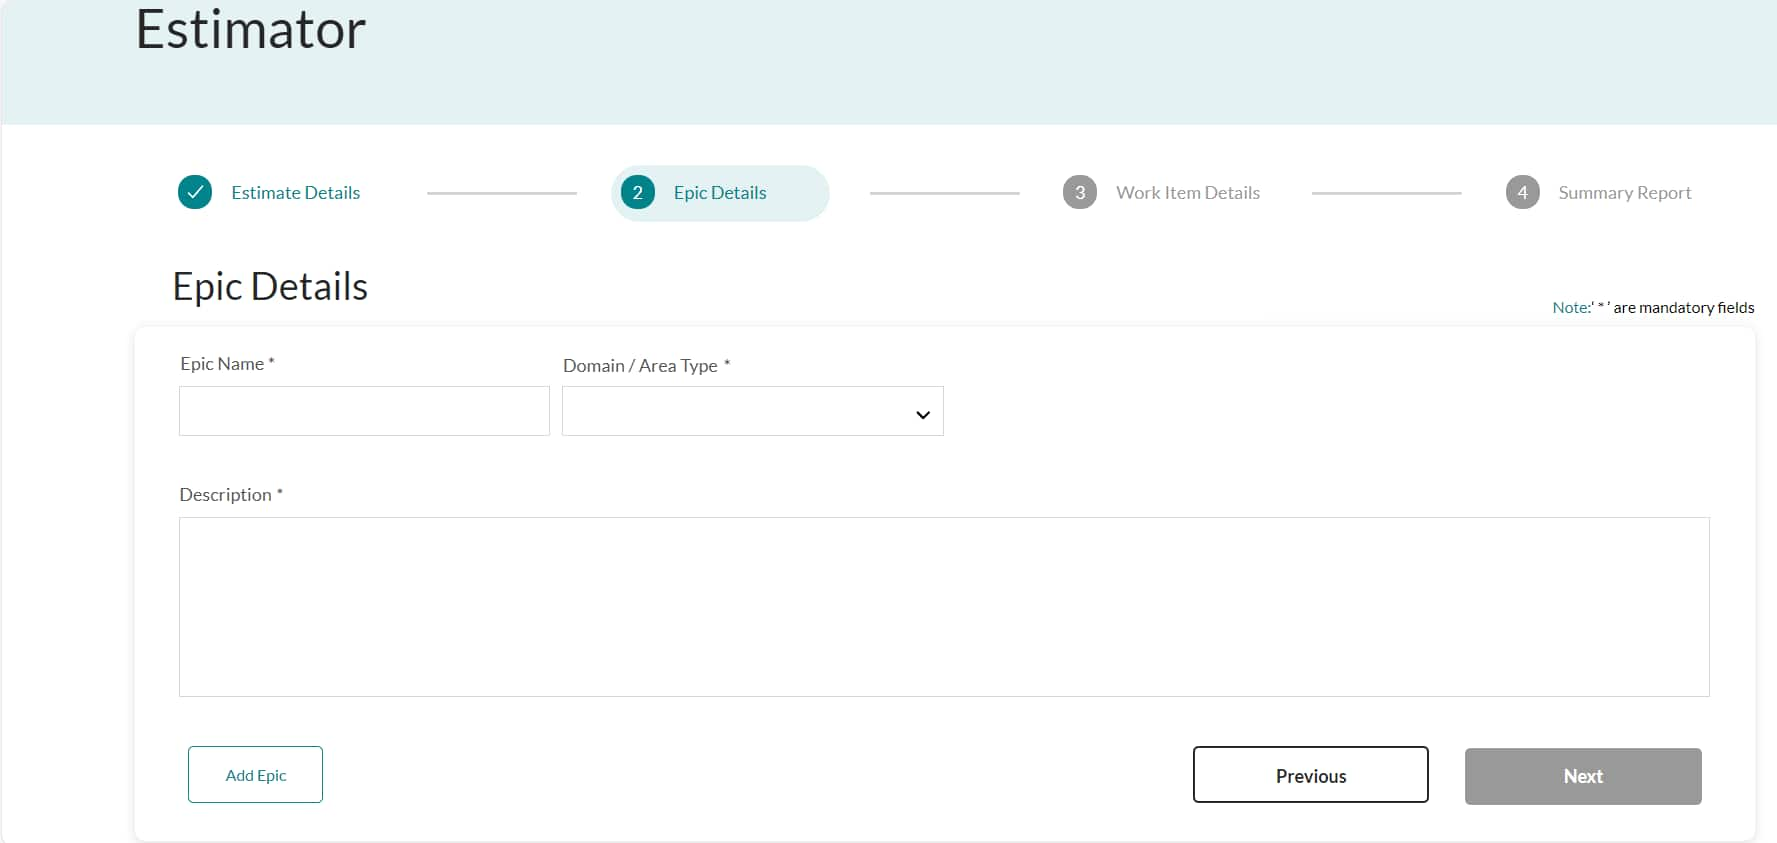
Once the user fills all the details and click Next button, he/she will be navigated to Step 2 of the Estimator Tool where they have to fill the step 2 form details
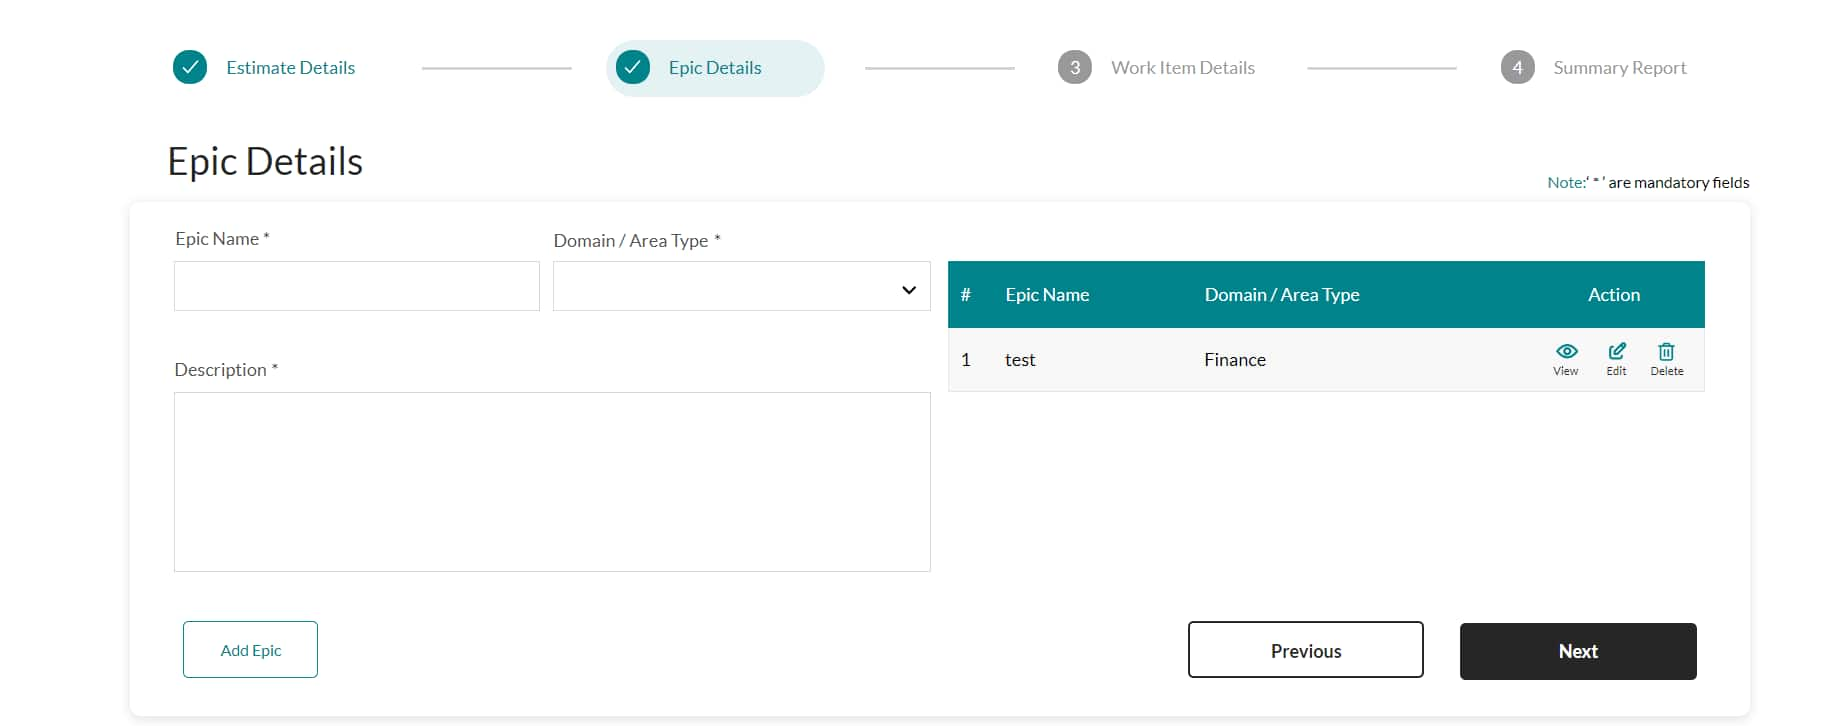
Here the user needs to fill the Epic Name, Select the Domain/Area Type and fill the description. User can add more than 1 Epic if needed.
Users will be able to Edit, View, Delete the Epic(s) that they have created from the action column
Step 3 - Work Item Details
Once the user Clicks on Next button, he/she will be redirected to step 3 of the estimator.
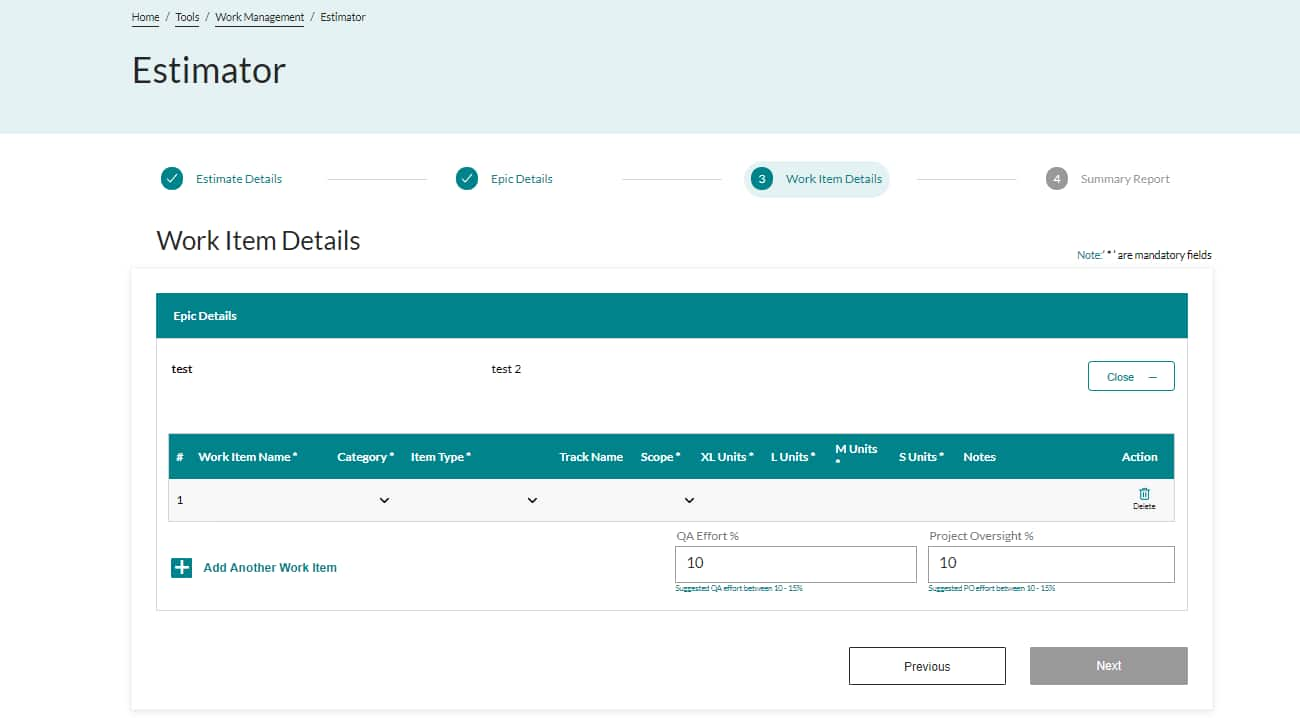
Here, the user is supposed to fill the Work item details under each epic that he/she has created
The work item Details that need to be filled are:
Work Item Name - A specific task or activity that needs to be completed as part of the project. When estimating efforts for a project, each work item is typically assigned an estimated duration or effort required to complete it.
Category - Refers to a grouping or classification of related work items. This will help in organizing and categorizing tasks based on their similarities or shared characteristics.
Item Type - Refers to the classification or categorization of work items based on their nature or characteristics. This will assist in differentiating between various types of tasks and provides additional information about the specific attributes or requirements associated with each item.
Track Name - The track name refers to a specific category or grouping of related work items that are organized based on a common theme or objective. These names are useful as they allow for better organization and coordination of tasks.
Scope - The defined boundaries and deliverables of the project. It outlines the specific goals, objectives, and tasks that need to be accomplished within the project's timeframe. In the scenario of our estimator tool, we currently have two options for scope, IN or OUT.
XL, L, M, S units - Are commonly used to represent different levels of effort or complexity associated with work items. These units help in categorizing tasks based on their size or scale, allowing for more accurate estimation and resource allocation. Our Estimator Tool has taken each portfolios' Master Inventory that contains efforts in units. Using this information provided to us, the tool will spit out an accurate estimation of effort required for an initiative.
Notes if any -
How the Calculation is Validated: Will elaborate more here. Include details about each of the fields.
Except Track name and Notes, all the other fields are mandatory fields.
There is also an action item column in the table with a trash can icon where user can go ahead and delete the work item
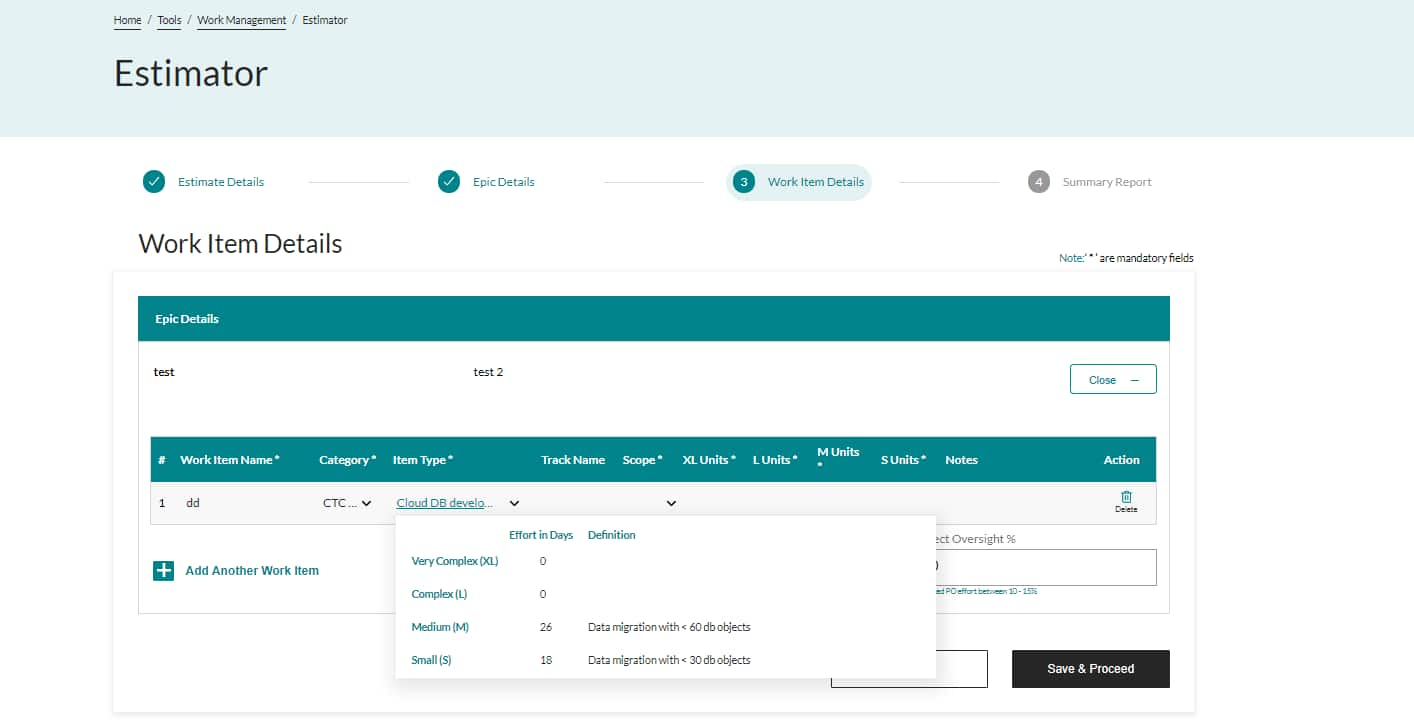
Hovering on Item type after filling the Category details, will show the user the effort details and definitions. This will help the user in deciding the effort.
Step 4 - Generate Report
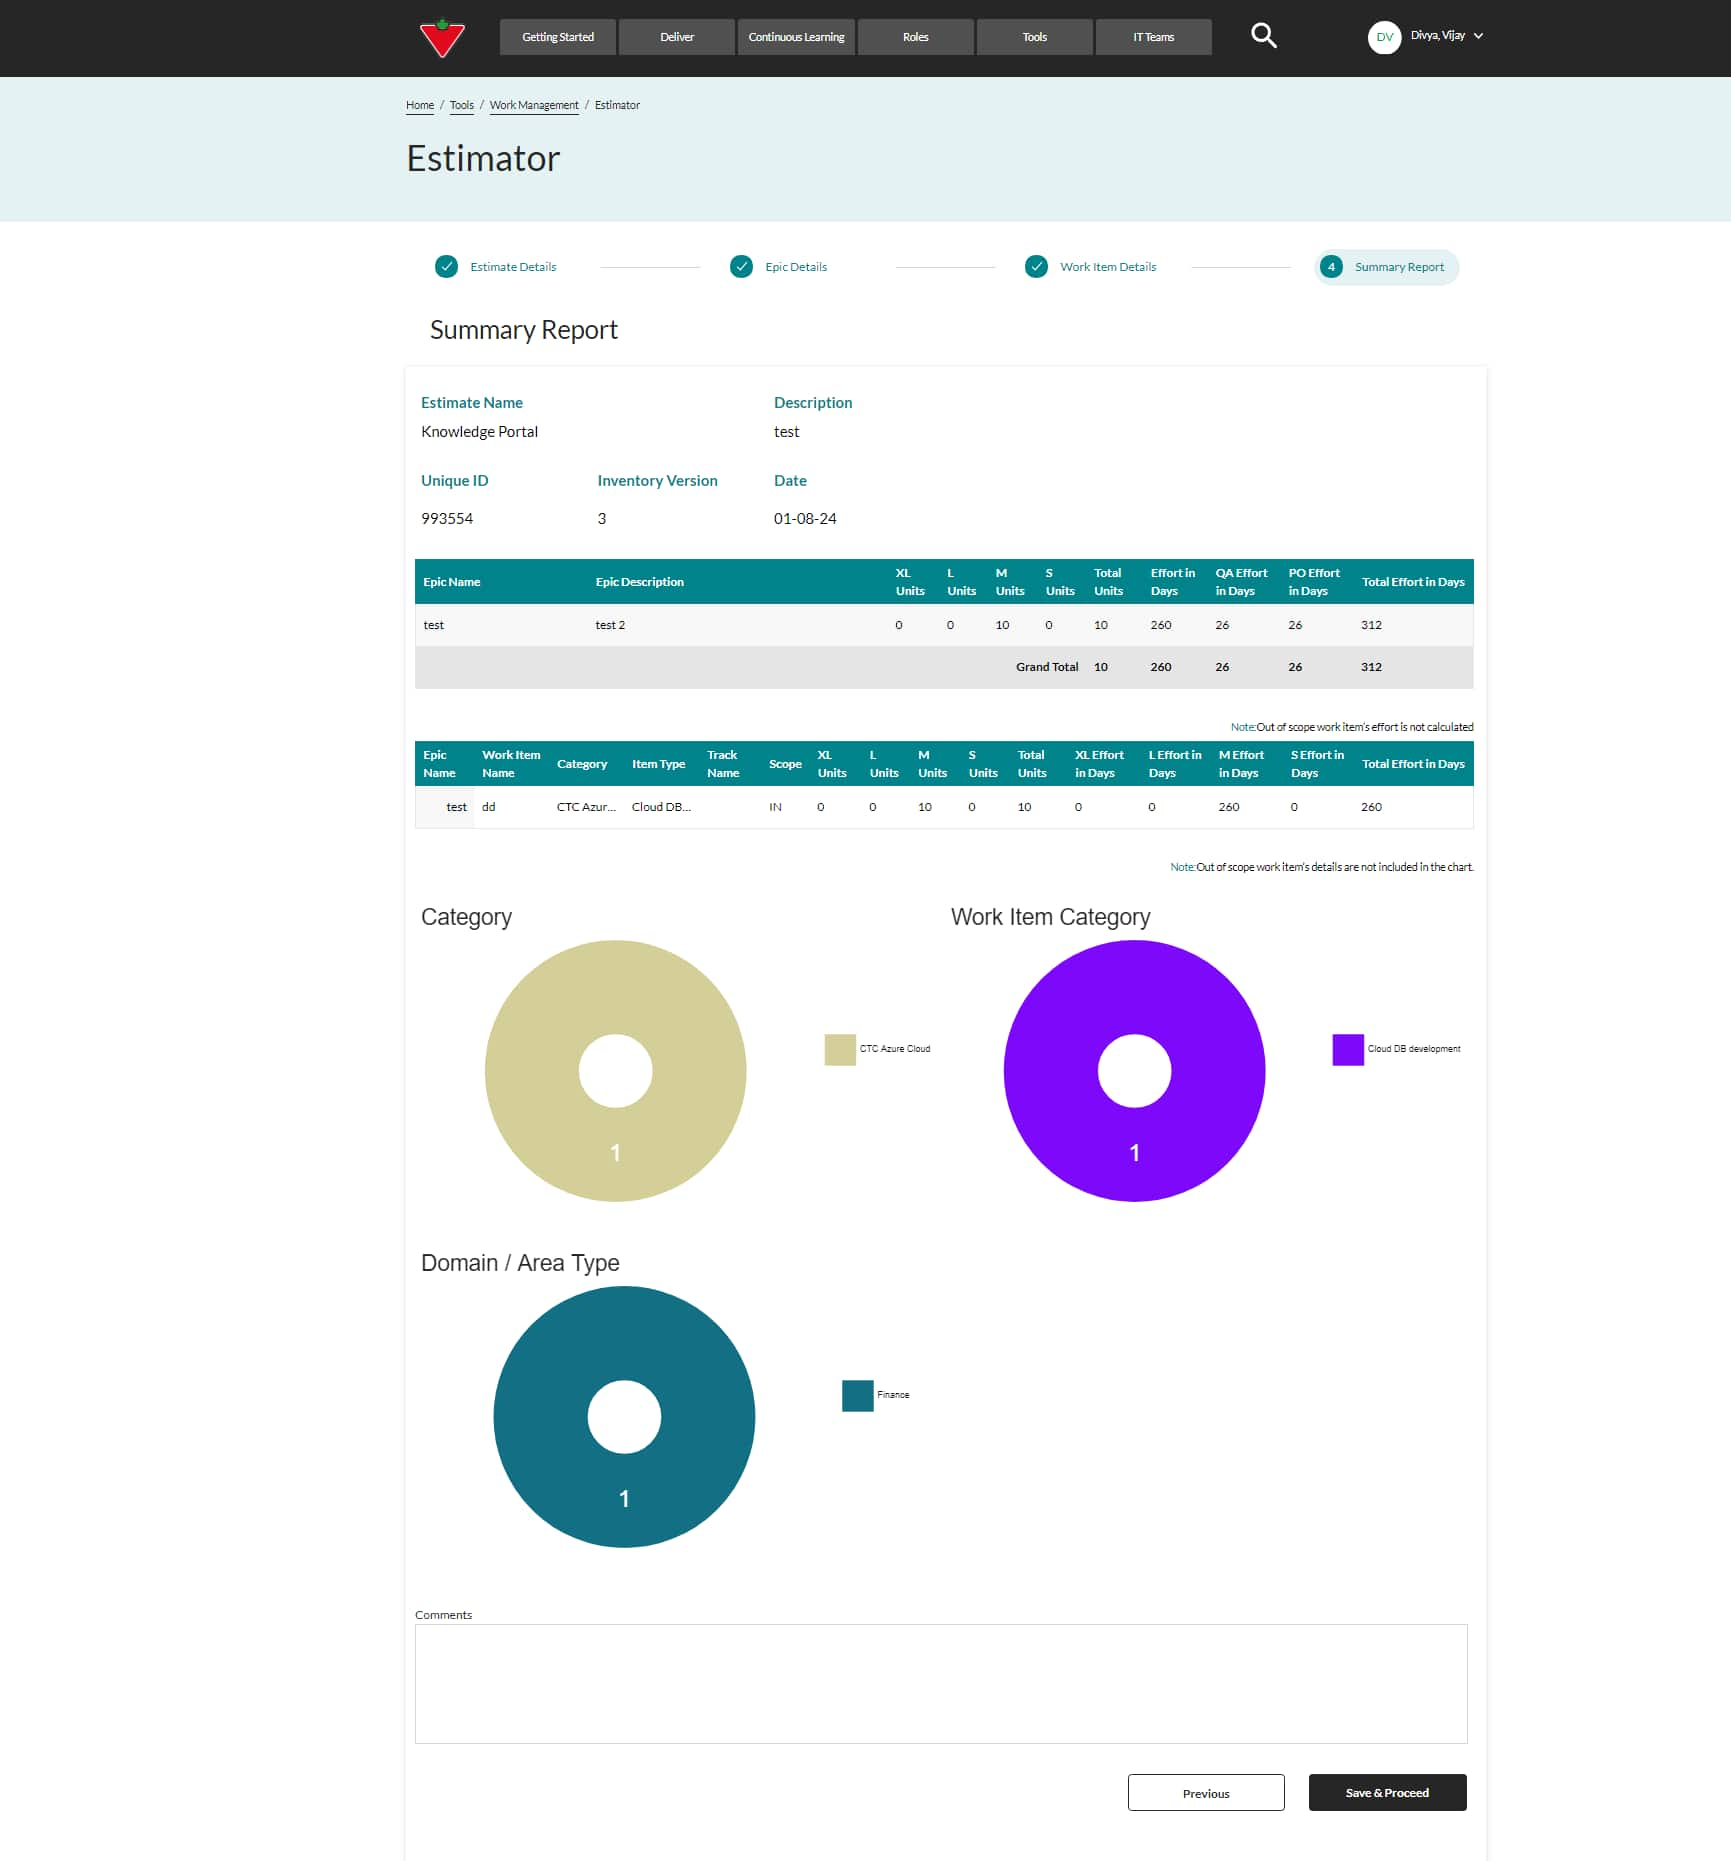
Once the user clicks on Save and Proceed, he/she is taken to step 4 of the estimator which is the summary report page. Here the user can see all the details that he/she has entered and the pi-charts will also be visible here. The user can then click on save and proceed button and the estimate will be sent for approval.
To go back to the dashboard
On dashboard there are 2 tabs, My Estimates & Estimates for Approval.
How a user can view or edit an estimate. There is an action column on the dashboard. Cannot edit the estimate when its been sent for approval, only view mode.
