Add an Old Version of a Test to a Test Suite
Identify the test and the version which you want to add to the test set
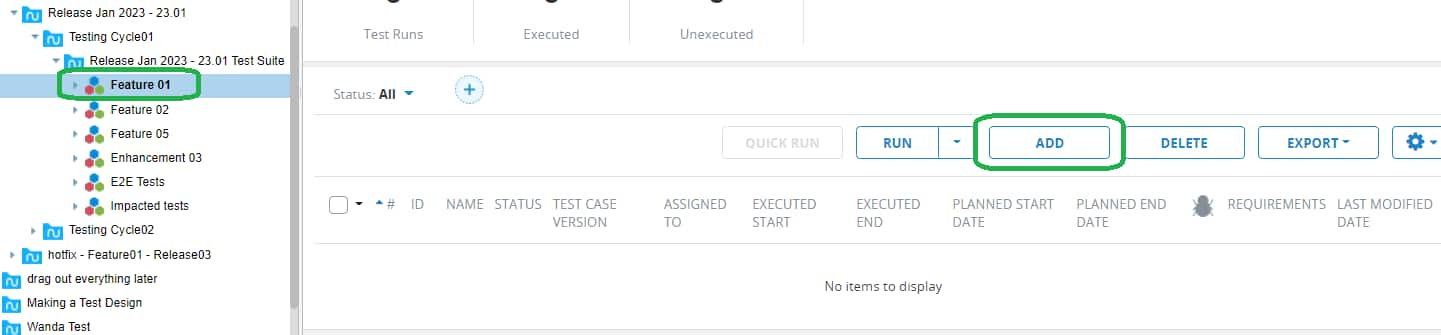
Identify the test suite in which the desired test is to be added. Select the test suite and click ADD
Navigate to the test in the master test suite, Select the test and click ADD

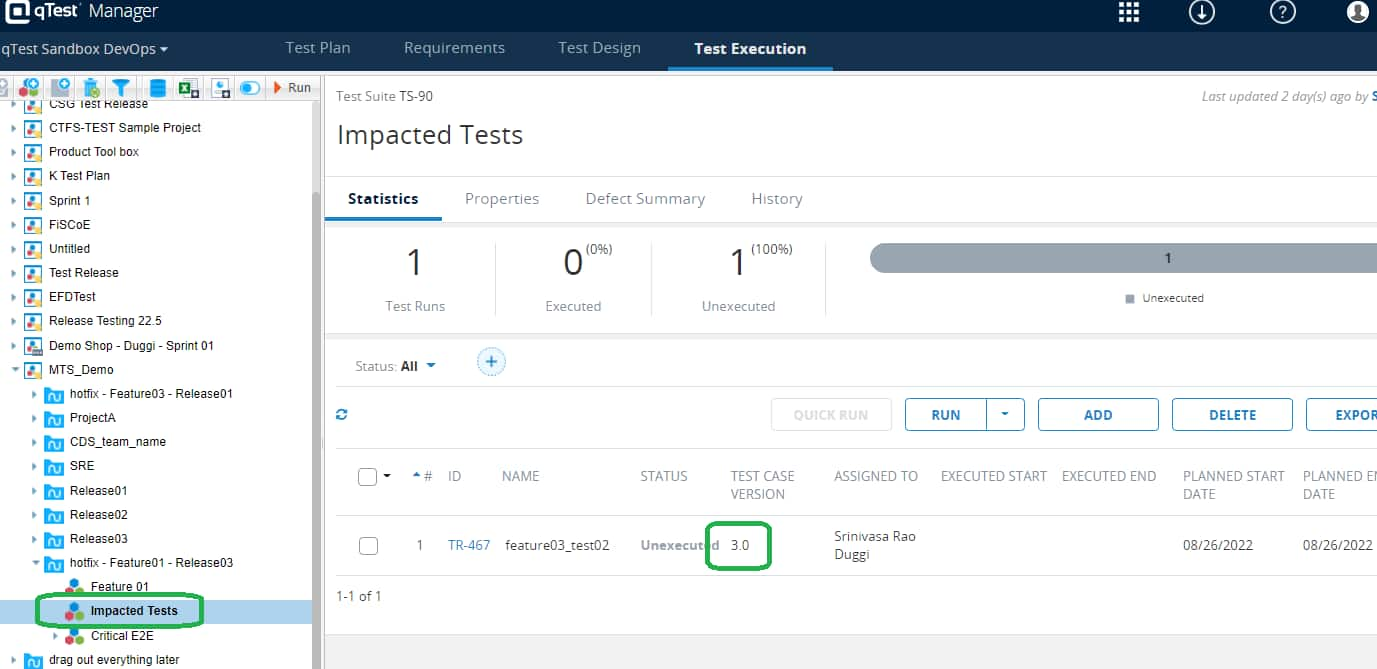
Observe that the latest version of the test is added [not the version that is desired]. To change the version of the test, follow the rest of the steps below
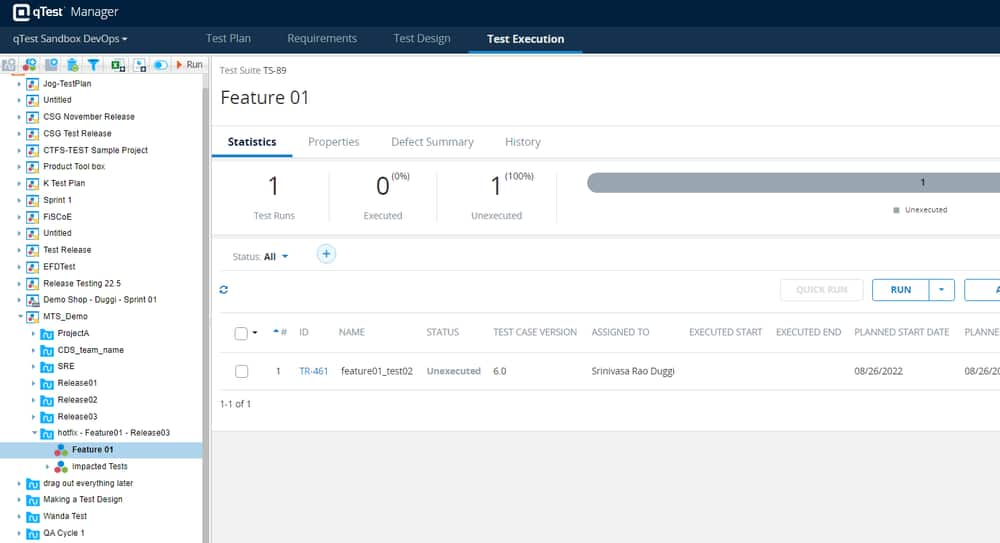
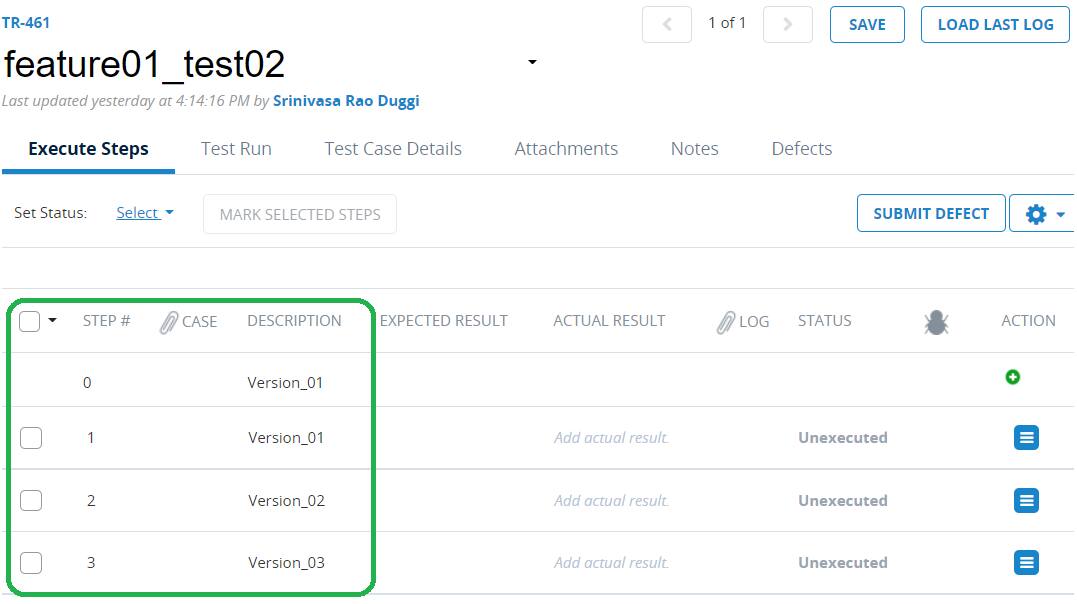
Open the test run properties by clicking on the ‘Test Run ID’ link of the added test
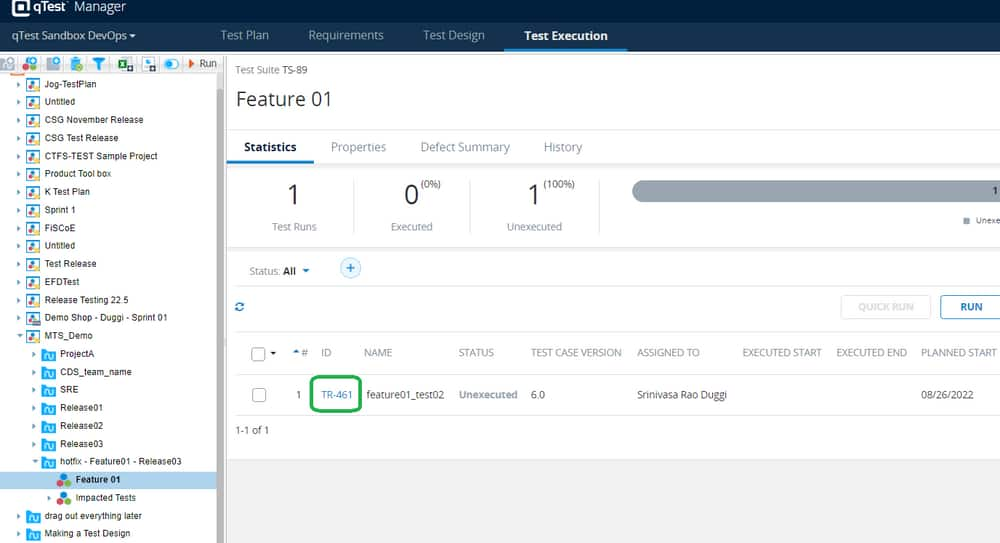
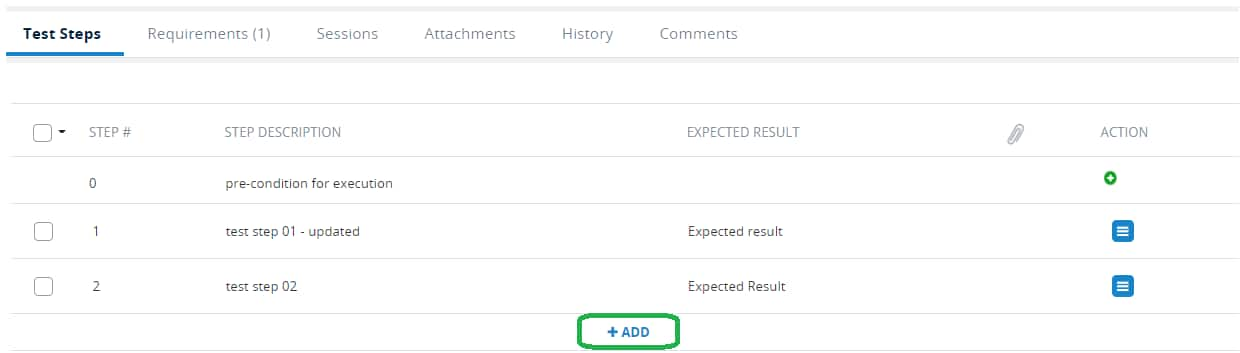
Select the desired test version from ‘Test Case Version’ and click ‘Save’
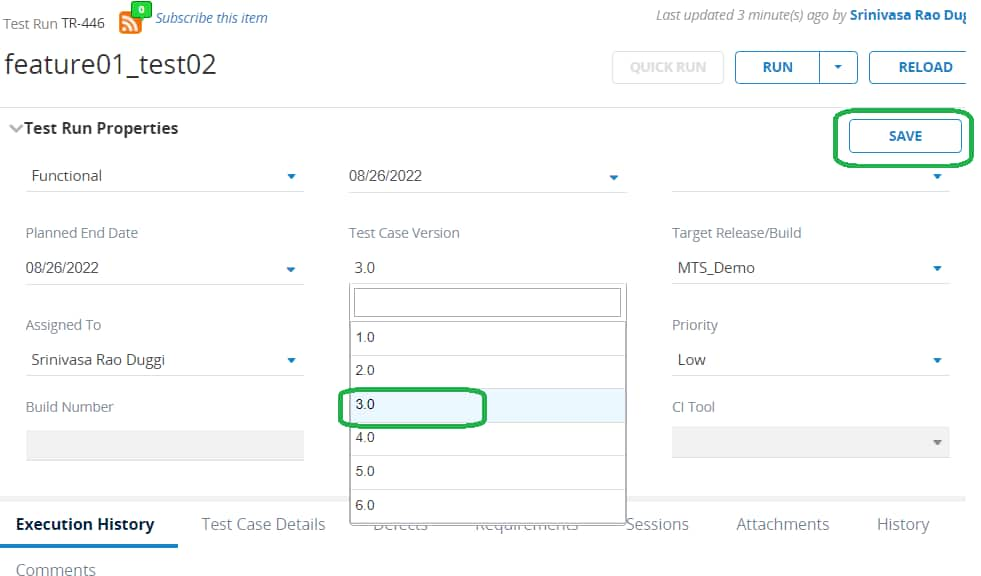
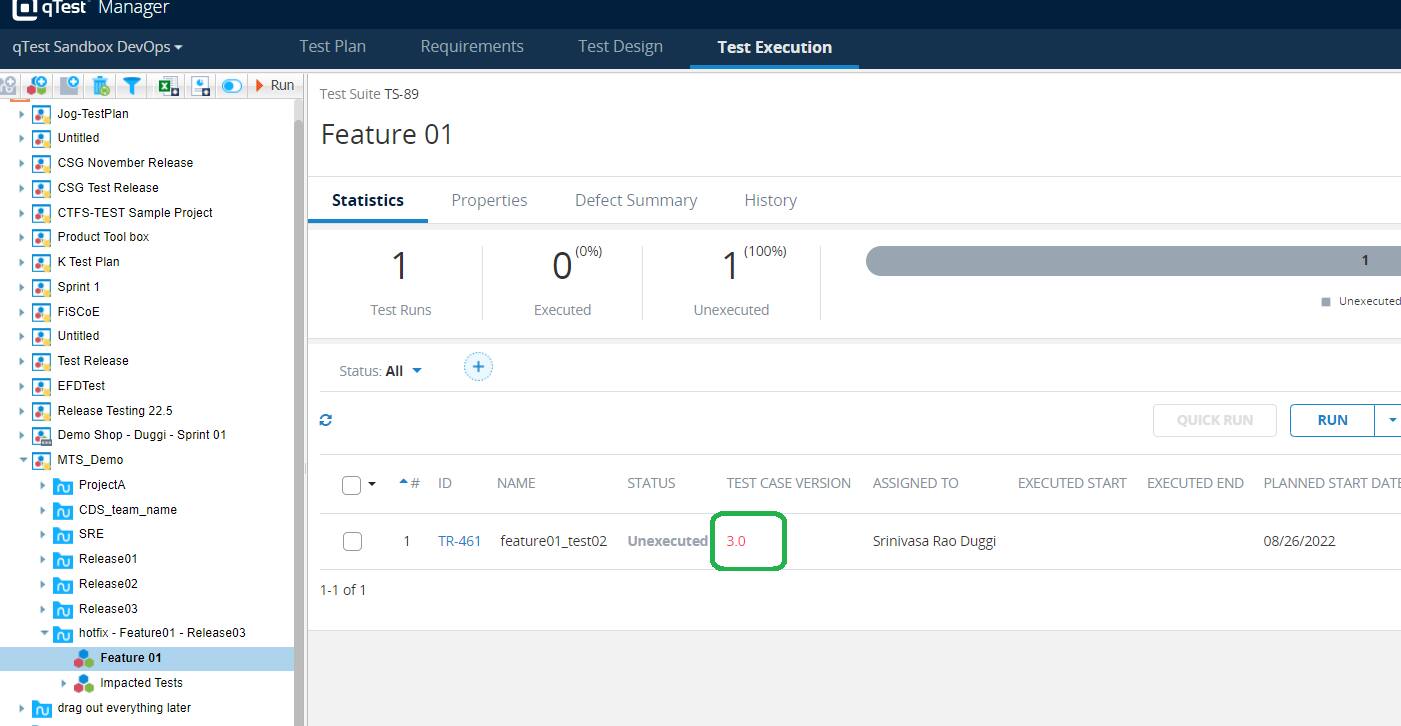
The desired version of the test is added to the test suite.

Run and Old Version of a Test
Prerequisite:
The below workflow assumes that the old version of the test is already added to the test suite.
To add a old version of a test to a test suite follow the steps at How Do I? - Test Selection & Execution | Add an Old Version of a Test to a Test Suite
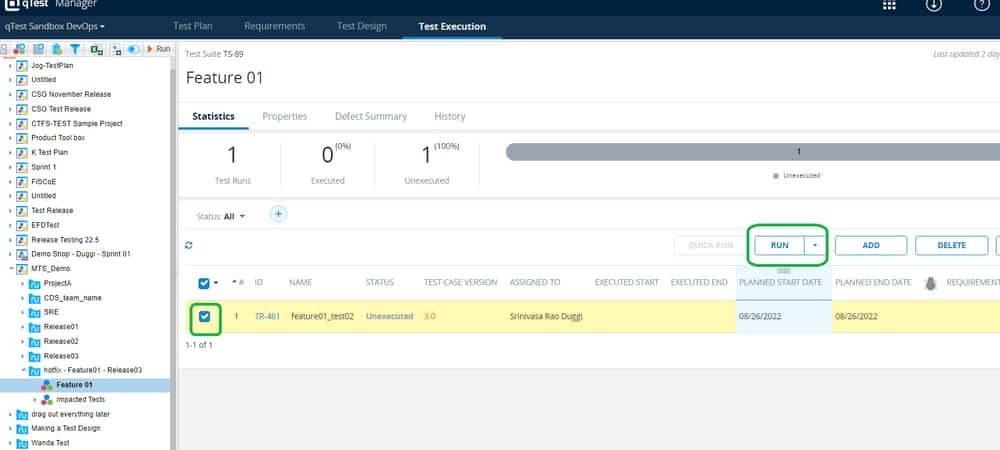
- Identify the test that you wanted to run, which is added to a test set
- Select the test and click Run
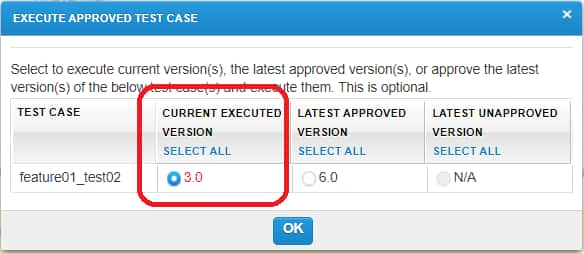
- Observe that there is a warning message that pops out to confirm the version of the test that you want to run. Ensure that you select the version that is added to the test suite.
Warning:
Select only the version of the test which is added to the test set.
In case you do not have clarity about which version is to be selected, contact your test lead to understand the right version of the test which is more applicable in the current scenario [hotfix testing, backward compatibility etc]
In case you choose a wrong version of the test, the test result will not be useful for the current test scenario and the test may fail
Select the right version and click Ok
Observe that the selected version of the test steps is displayed
- Execute the test and report the test result
- With this workflow, we have executed the desired version of the test and the results are saved.
Create an RTS for Release Regression
To understand the Release Testing Process go through Release Testing Process
Process to create RTS (Release Test Suite) for Release Regression
Select the test and click Run
- Observe that there is a warning message that pops out to confirm the version of the test that you want to run. Ensure that you select the version that is added to the test suite.
Warning:
Select only the version of the test which is added to the test set.
In case you do not have clarity about which version is to be selected, contact your test lead to understand the right version of the test which is more applicable in the current scenario [hotfix testing, backward compatibility etc]
In case you choose a wrong version of the test, the test result will not be useful for the current test scenario and the test may fail
Select the right version and click Ok
Observe that the selected version of the test steps is displayed
Execute the test and report the test result
With this workflow, we have executed the desired version of the test and the results are saved.
Create an RTS for Release Regression
To understand the Release Testing Process go through Release Testing Process
Process to create RTS (Release Test Suite) for Release Regression
*Note: If release is done by the same team (no SRE), then adding regression scope will be done by that team
Step-by-step process
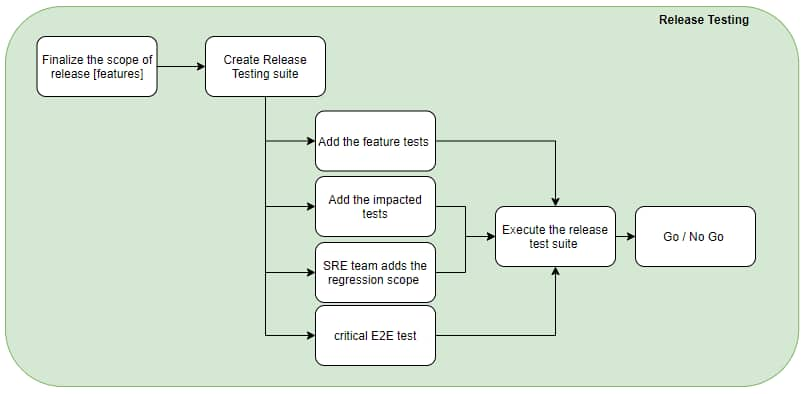
The ‘Release Regression test suite’ creation process has the following steps
Create an RTS suite for the release in the qTest test execution tab
Add the feature tests that are part of the Release
Add the tests whose functionality is impacted
Add the required critical E2E flows
- STEP01: Create an RTS suite for Release Regression
- create a test cycle using standard naming convention and test suites for
- feature tests
- impacted tests
- critical E2E flows
STEP02: Add the feature test cases
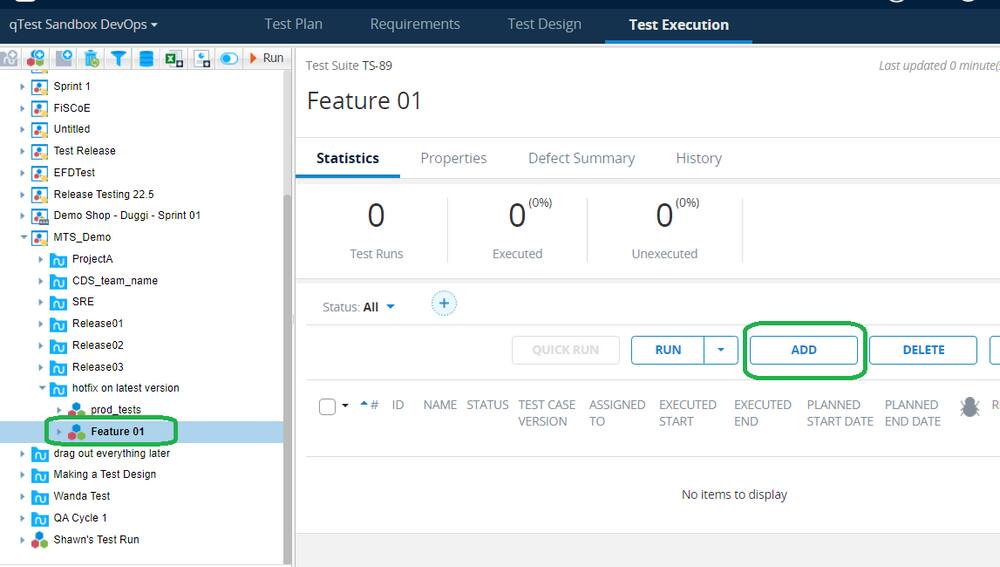
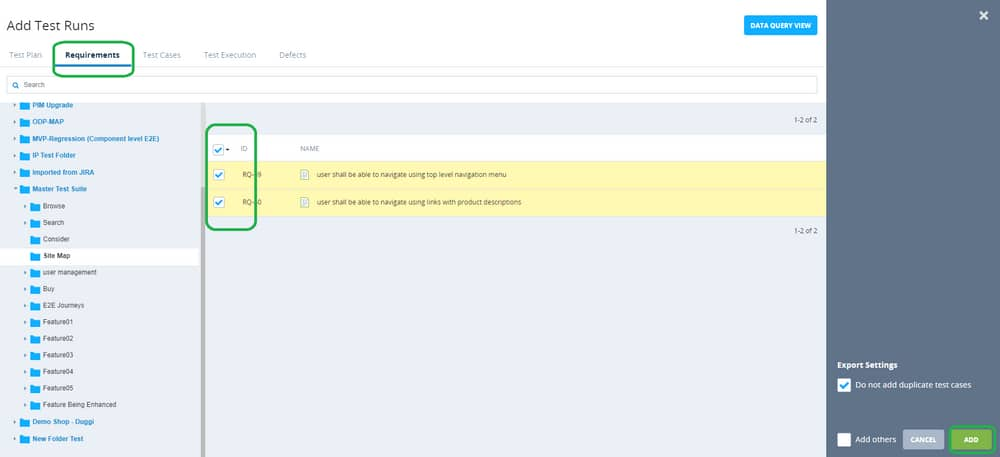
Select the test suite and click ADD
- Go to the Requirements tab, navigate to the requirements folder, select all the requirements for the feature, and Click ADD
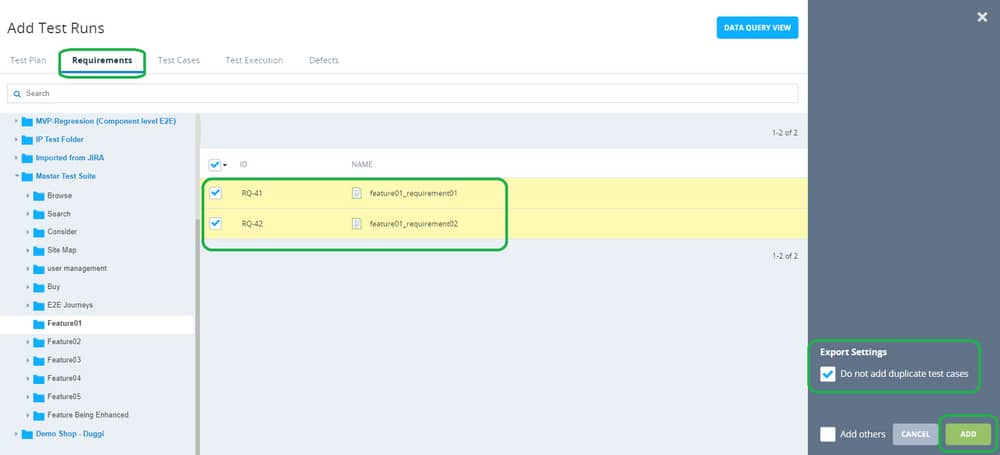
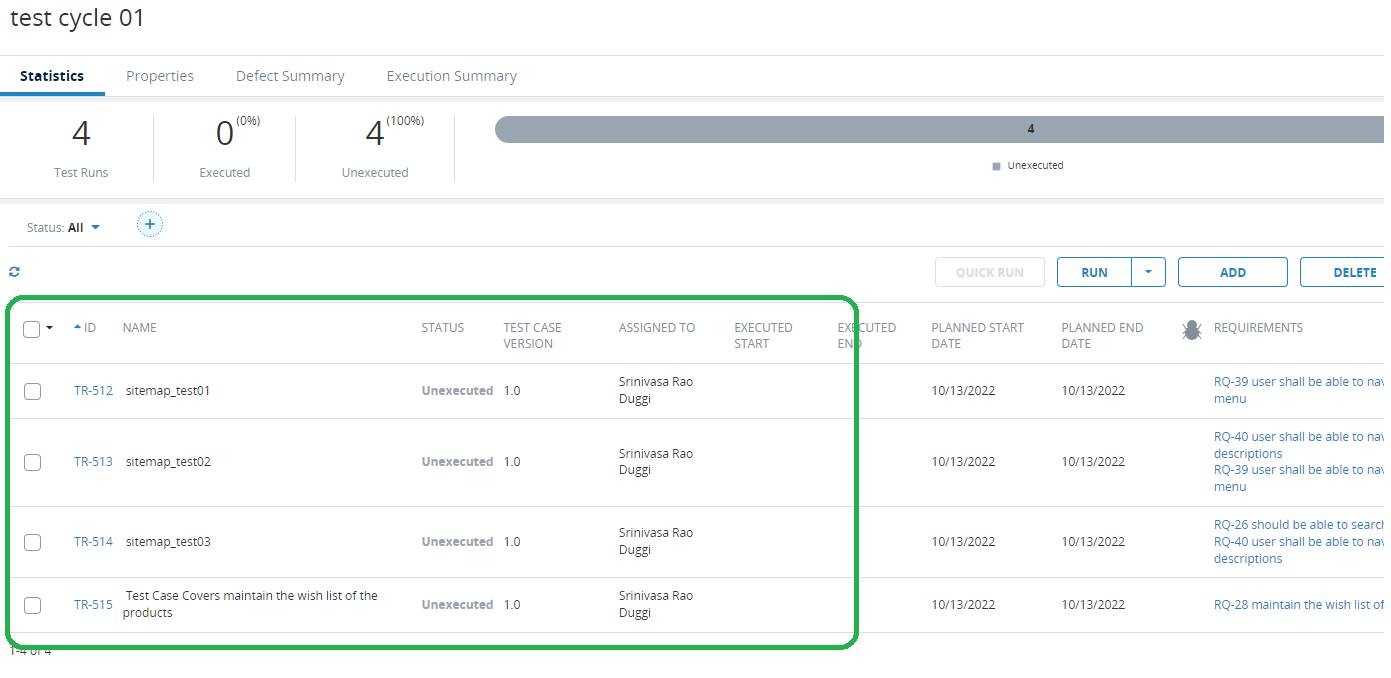
- All the test cases that cover the selected requirements are added to the set
Repeat the process for all the features of the release
STEP03: Add the impacted tests
Identify the tests that are impacted by the scope of the release
Add the test impacted tests using the ‘ADD’ option from the qTest
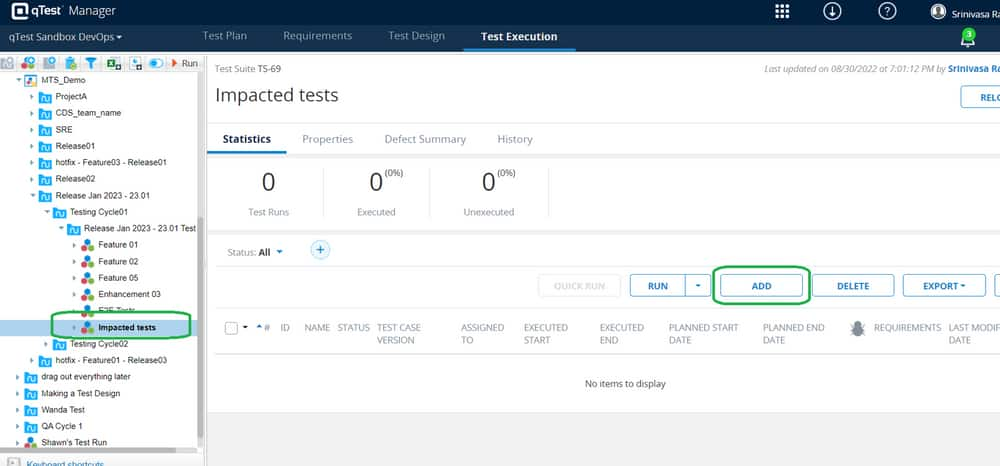
Go to the Test Cases → Select the Feature → Select the Tests → Click ADD
Observe that the impacted tests are added to the suite
STEP04: Add the required critical E2E flows
Repeat Step 03 to add the release version of E2E tests to the test suite
By following the above steps, You have created the Release Test Suite for the release scope
Create an RTS for a Hot Fix Release
Prerequisite:
You shall know the release details on which the hotfix is to be tested.
You shall know the scope of the hotfix
Hotfix RTS creation process
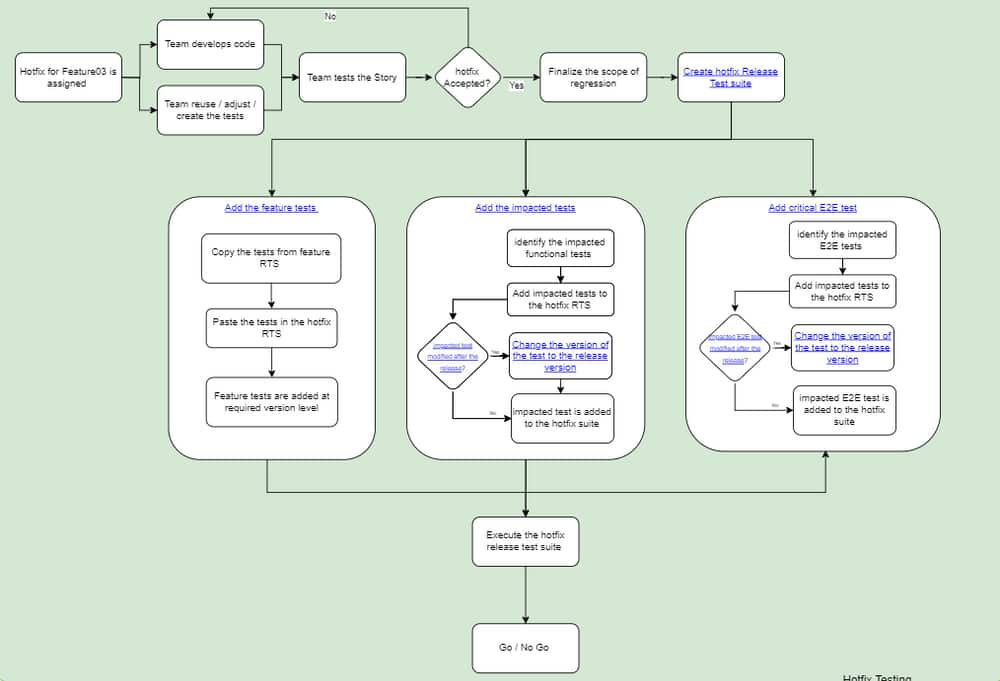
Step-by-step process
The ‘hotfix release test suite’ creation process has the following steps
Create an RTS suite for hotfix in the qTest test execution tab
Add the feature tests that are part of the hotfix
Add the impacted tests whose functionality is impacted by the hotfix
Add the required critical E2E flows
The scenario considered in the screen shots as below
The hotfix is made for Feature 01 which is released in Release 03.
As part of the hotfix, the test ‘feature03_test02’ is impacted, which is released in Release01
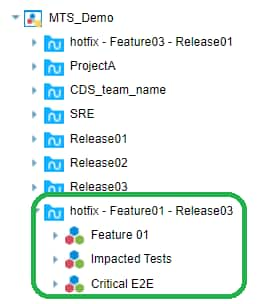
STEP01: Create an RTS suite for the hotfix
create a test cycle with standard naming convention and test suites for
feature tests
impacted tests
critical E2E flows
STEP02: Add the feature tests to verify the hotfix
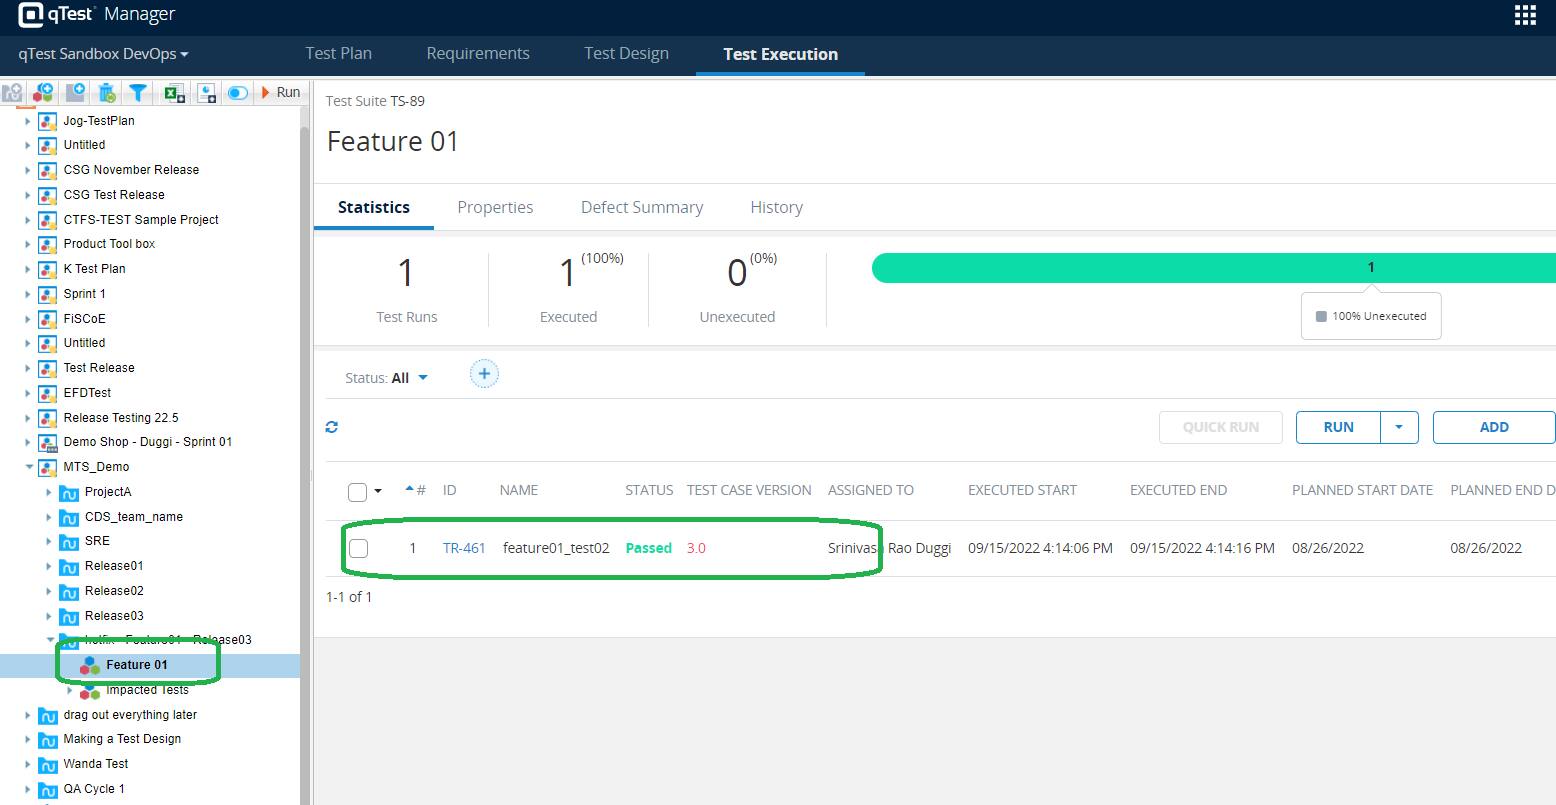
Go to the release test suite, as part of which the feature for which the hotfix is made [in the given example, Feature 01, is released as part of Release 03 → RTS for Release03 is ‘Release03 Test Suite’]
Select all the tests that are executed as part of the feature release [feature01_test01 and feature01_test02]
As there could be updates to the feature after the release, the test cases also could have been updated. As a result, you may observe that some of the tests are outdated.
So, Do not change the version of the tests in the test suite as the intention is to execute the release version of the tests as part of hotfix release
- Right click on the check box → click Copy
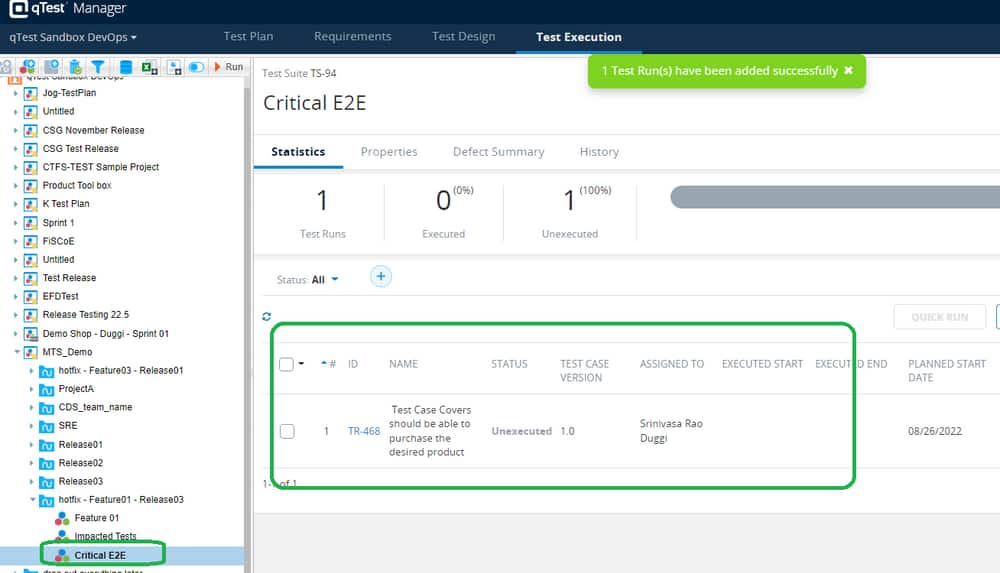
Go to the release test suite for the hotfix release ['hotfix - Feature01 - Release03' → Feature01]
Right click on the test suite name → click Paste
Observe that the tests are added to the suite at the required version levels. [Remember that we need to execute the release version of the tests as part of hotfix testing]
STEP03: Add the impacted tests
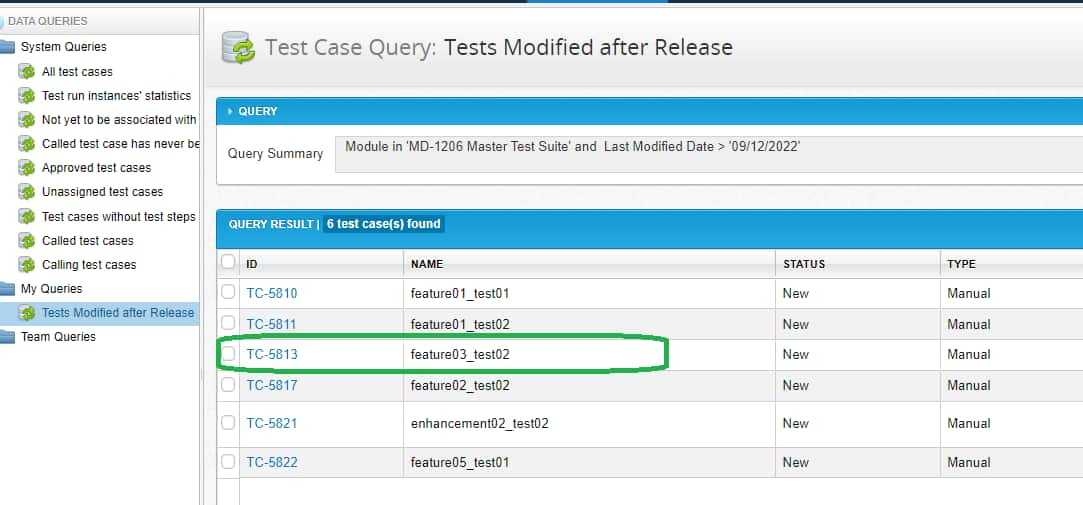
Identify the tests that are impacted by the hotfix ['feature03_test02']
Add the impacted tests using the ‘ADD’ option from the qTest
- Go to the Test Cases → Select the Feature → Select the Tests → Click ADD
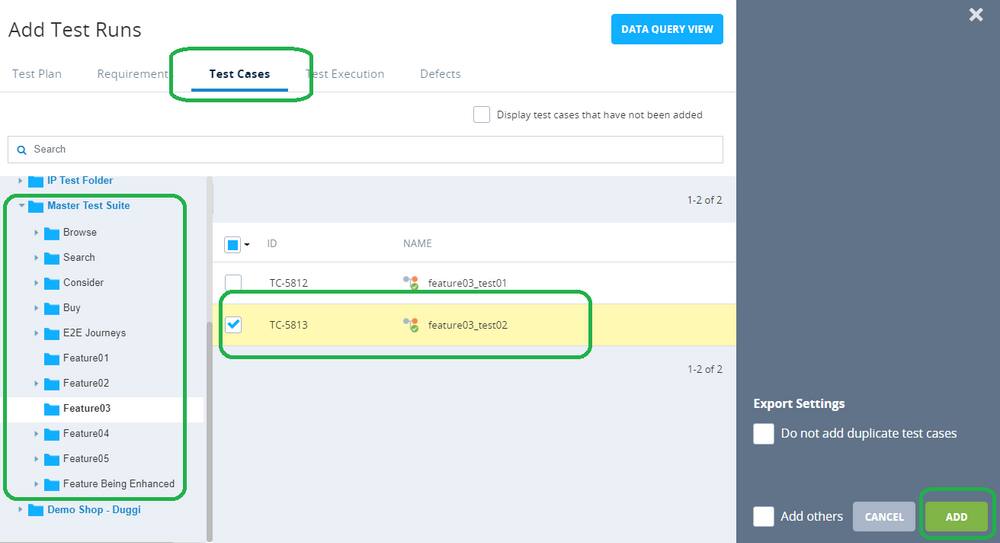
- The latest version of the impacted tests is added to the suite.
With help of the above steps we are able to add the latest version of the impacted tests. However, we needed to add the release version of tests, but not the latest version. So we needed to identify if the impacted tests are modified after the release. To know if the impacted tests are modified after the release, we need to follow the below process..
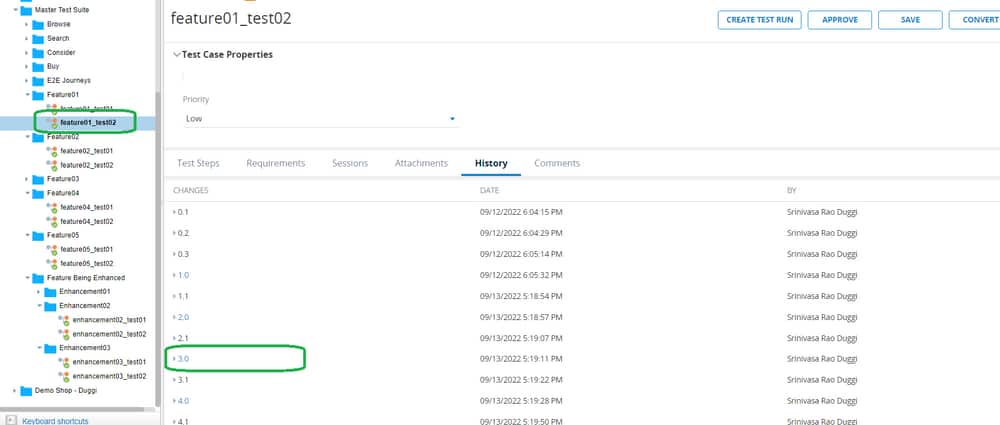
To Identify all the tests modified after the release on which the hotfix is made ['Release 03'] [How do I identify all the tests How Do I? - Oversight | Identify All Tests Modified After a Release ]
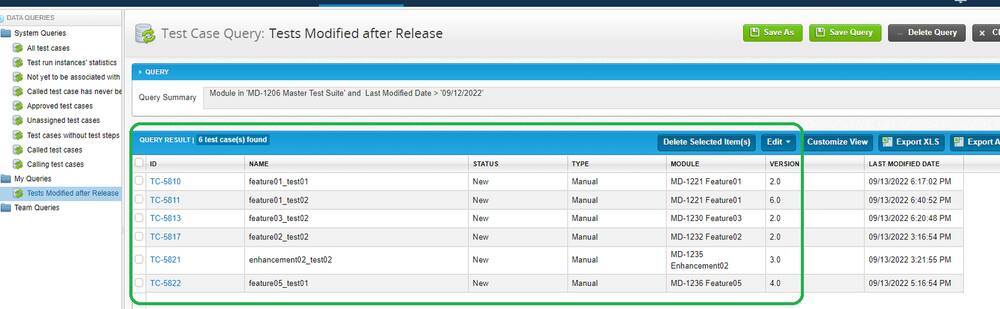
Go to the test case in the MTS
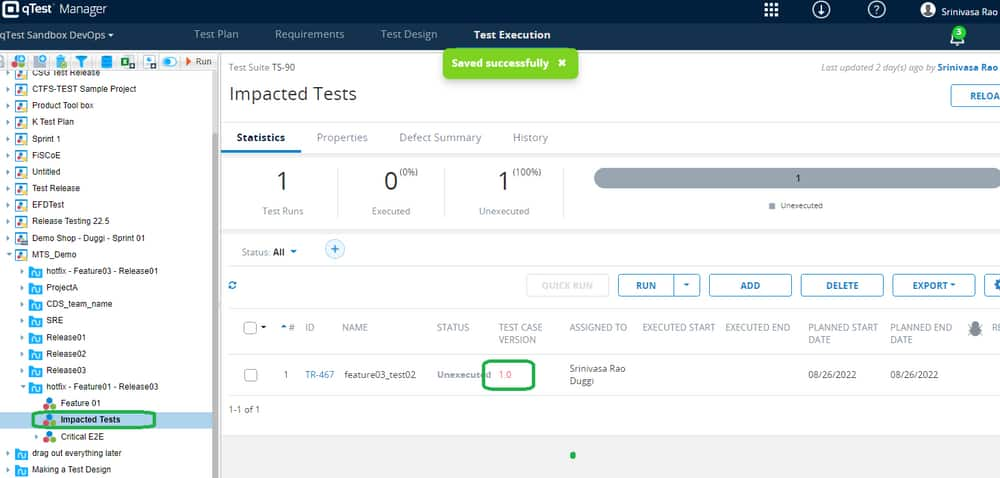
Go to the History Tab and identify the appropriate version to execute for the hotfix [version1.0 - verify the modification date]
update the test in the hotfix suite [hotfix - Feature01 - Release03 → Impacted Tests] with the desired version [1.0 in this case] For instructions to add the old version of tests to the test suite follow the instructions at How Do I? - Test Selection & Execution | Add an Old Version of a Test to a Test Suite
- If the test is not modified, keep the latest version of the test in the suite.
- This process is to be repeated for all the impacted tests to ensure that you are adding the release version of the tests to the impacted test suite.
STEP04: Add the required critical E2E flows
Repeat Step 03 to add the release version of E2E tests to the test suite
By following the above steps, You have created the Release Test Suite for the ‘hotfix’ release
Create an In-Sprint Test Execution Suite
Prerequisite:
You must know the current release and the sprint
Under the current release in the Test Execution tab, create a test cycle for the in-sprint testing [naming: To match with sprint name in Jira ]

Select the test cycle and add the test suites as per the features developed in the sprint
Add the tests to the test suites using the ADD button → Goto Requirements Tab → select the requirements that are developed in the sprint
- Observe that the tests are added to the suite
- Repeat the process for all the sub suites
- Observe that the tests are added
Execute the tests and record the results in qTest
By following the above steps, you have created and executed the in-sprint test execution suite