Overview:
Here we will focus on creating robust test cases that cover all aspects of the technology's functionality. Techniques such as boundary value analysis and equivalence partitioning help ensure comprehensive coverage and accurate results.
| Search For A Test | |
|---|---|
Prerequisite
|
 |
| Navigation | |
|---|---|
|
 |
| Search On the Navigation | |
|---|---|
|
 |
|
 |
| Demonstration | |
|---|---|
|
 |
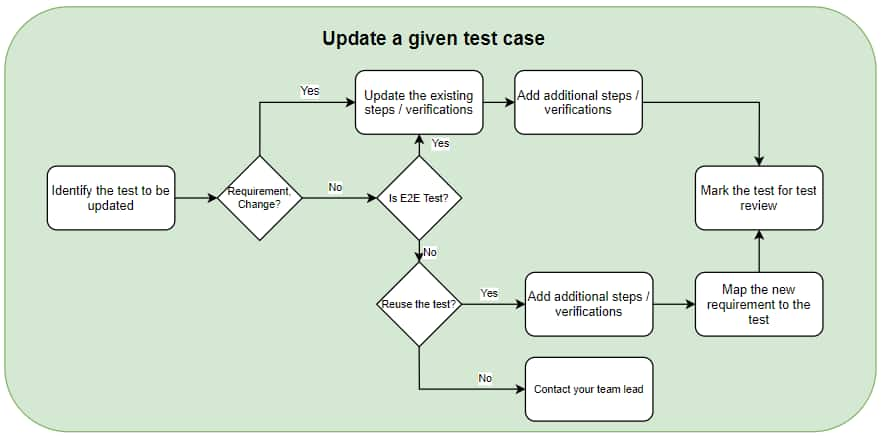
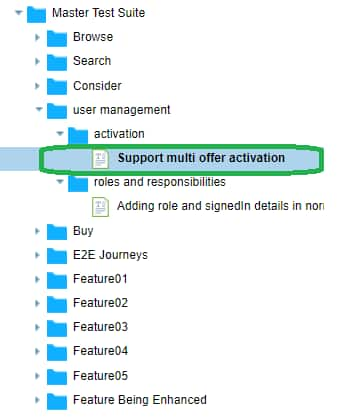
Update An Existing Test Case
Prerequisite
You have already identified the test to update
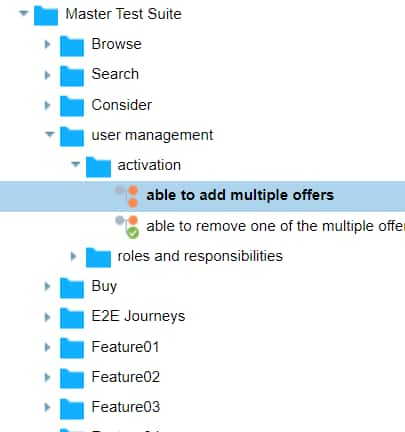
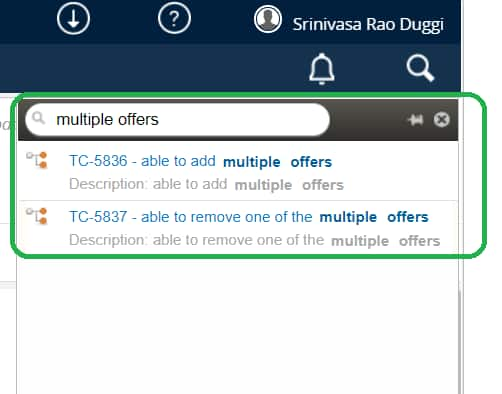
If you need to search for a test to update follow the How Do I? - Test Cases | Search For A Test
An update to an existing test is needed in one of the following cases
Case 01: The Requirement, which is covered by the test, is updated/changed/modified
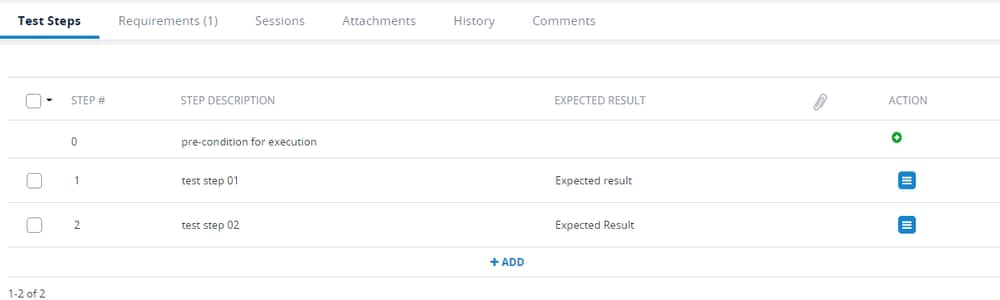
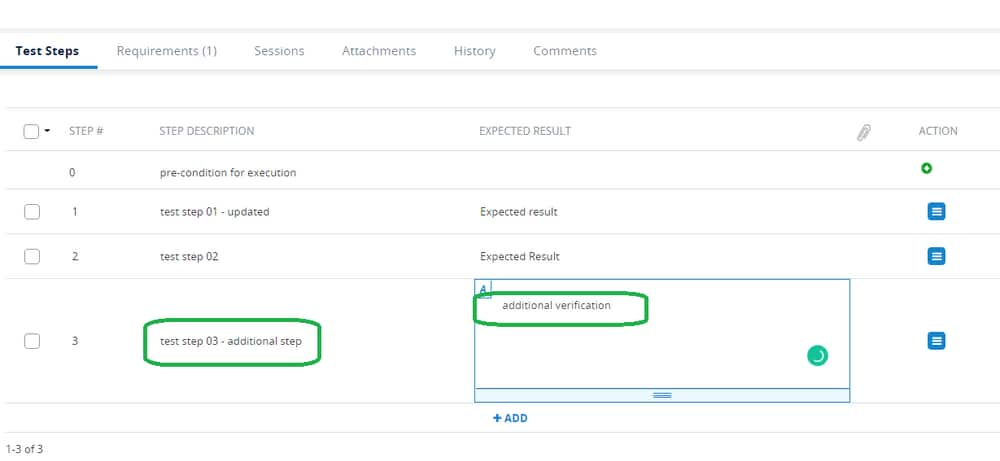
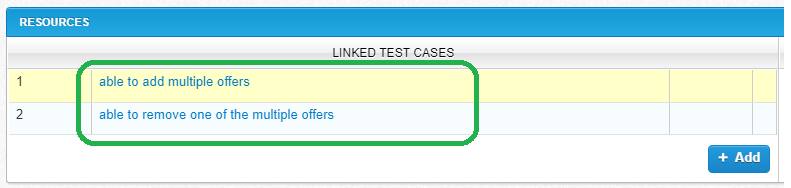
Case 02: The test can cover an additional Requirement by adding additional steps and verifications. To avoid duplication of steps, you want to update the test.
Case 03: update the E2E test case
|
 |
| Case 01: Change in the Requirement | |
|---|---|
|
 |
|
 |
|
|
|
 |
 |
|
|
|
 |
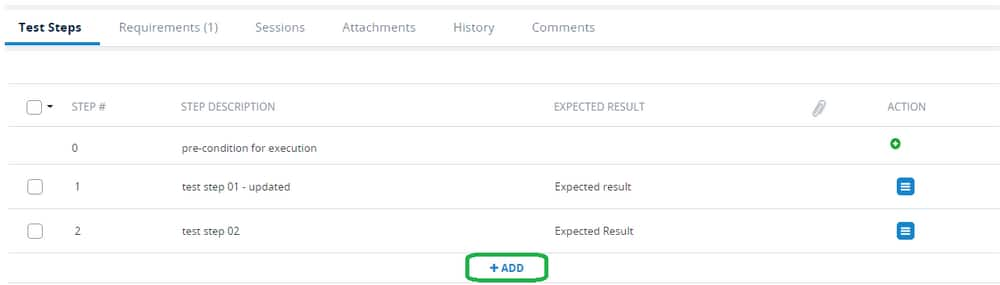
- Change the status of the test to ‘Ready for Review’ and change ‘assigned to’ to your test lead
| Demonstration |  |
|---|
| Case 02: Reuse existing test to cover additional requirements | |
|---|---|
|
 |
|
|
| Case 03: Update an E2E test case | |
|---|---|
|
|
|
|
|
|
|
|
|
|
|
|
Create A New Test Case
Before you write a new test
Search if an existing test covers the scenario using How Do I? - Test Cases | Search For A Test
If an existing test covers the scenario, link the existing test to the requirement using How Do I? - Requirements | Link an Existing Test to a Given Requirement
If you need to update a test [add additional steps / verifications ] to cover the new scenario, update test using How Do I? - Test Cases | Update An Existing Test Case and link the updated test to the requirement using How Do I? - Requirements | Link an Existing Test to a Given Requirement
For creating test cases for a given requirement How Do I? - Requirements | Create Test Cases for a Given Requirement
| Creating a new test for a given requirement | |
|---|---|
|
|
|
|

|
|
|
|
|
|

Create An End-to-End Test Case
Before you write a new end-to-end test
Search if an existing test covers the scenario using How Do I? - Test Cases | Search For A Test
If you need to update a test [add additional steps / verifications ] to cover the new scenario, update the test using How Do I? - Test Cases | Update An Existing Test Case
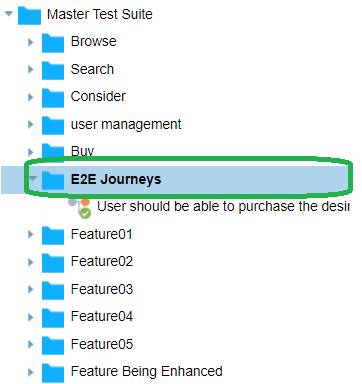
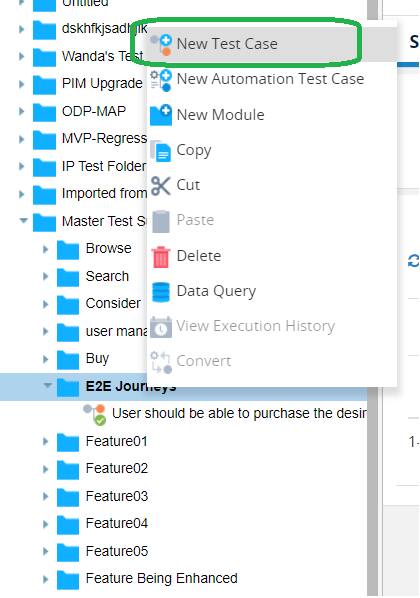
Creating a new end-to-end test case
Prerequisite
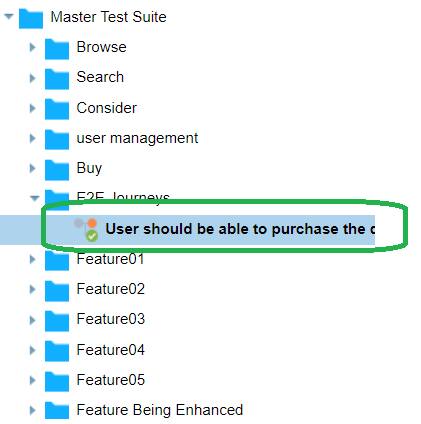
You should be aware of the user journey flow for the E2E test
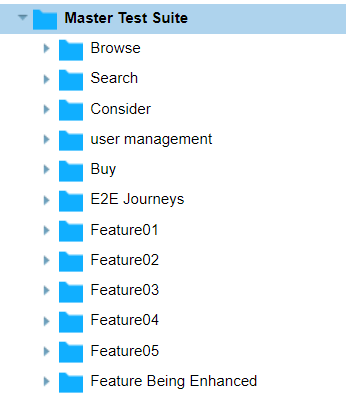
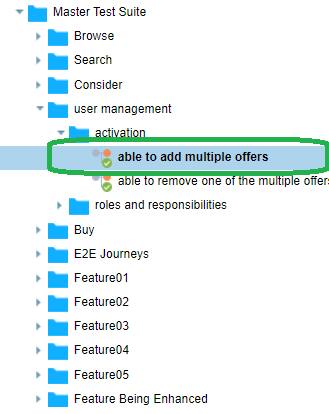
Go to the Master Test Suite and navigate to the E2E journey hierarchy in Test Design of qTest
 |
 |
|
|
|
|
You have successfully created an E2E test case